Ok, now that summer is over and we are into the fall season, it is time to winterize your Motorhome, RV, travel trailer or fifth wheel. I know through experience that the information in the so called owner's manual, or in the case of our Coachmen Prism, the black bag that is simply filled with the manuals from each component, is very lacking in detail for things like winterization. So, this year I remembered to take some photos of the process that I use, in hopes that others may find it useful. I also (shameless plug coming) have hopes that you might actually buy some AMSOIL products from me! Remember, fall is the best time to change the oil in your engine and generator. Through use, your oils will become acidic. It is best to drain this oil out and refill with brand new oil prior to putting your rig up for the winter. Click here to see the AMSOIL products for your RV, Motorhome or Tow Vehicle. I also highly recommend using AMSOIL Diesel Fuel additives. They keep injectors and pumps clean and lubricated!
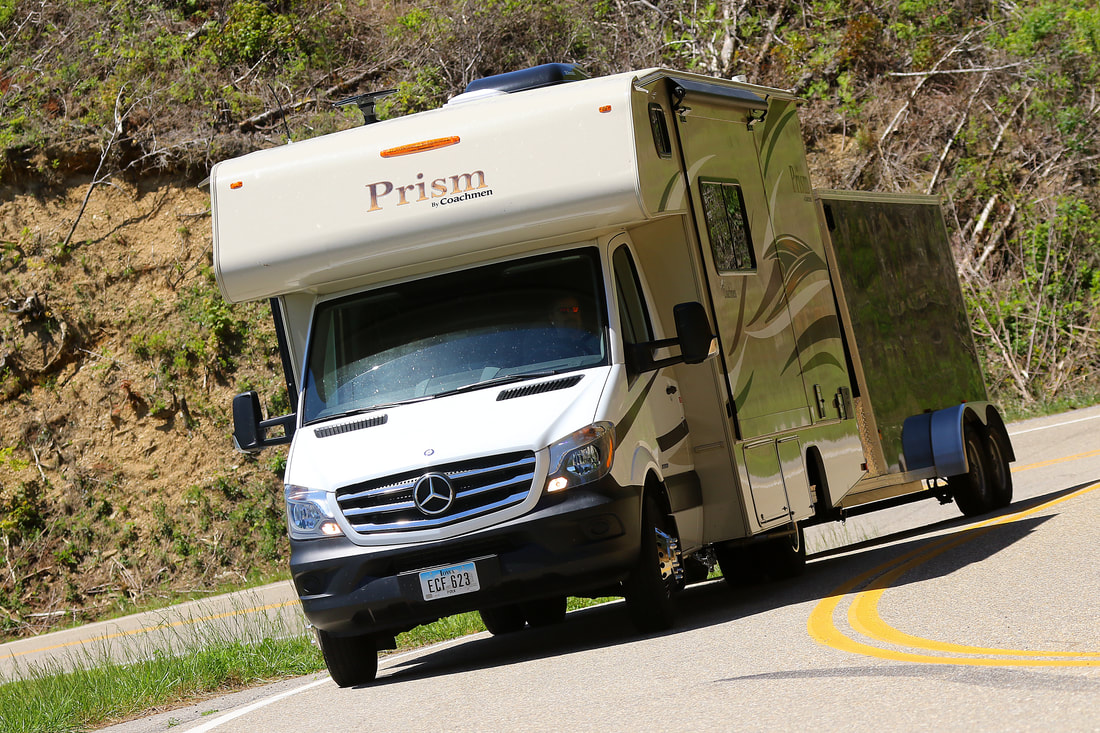
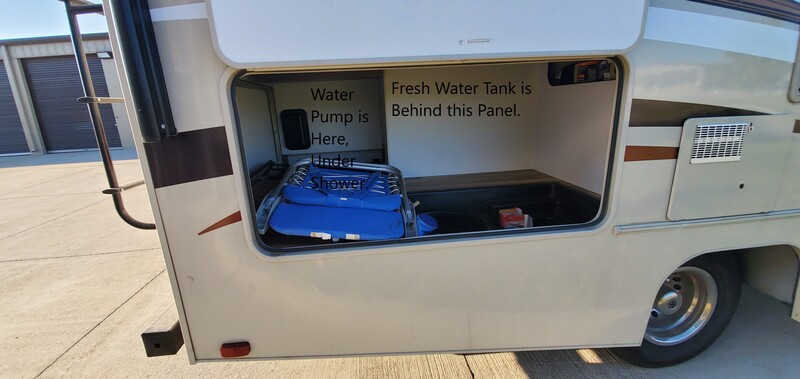
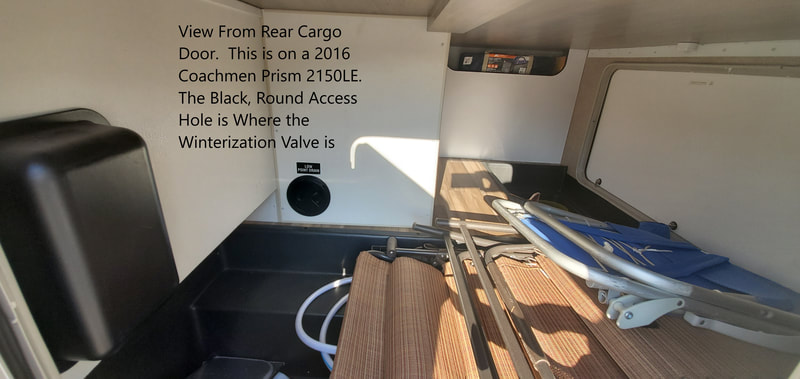
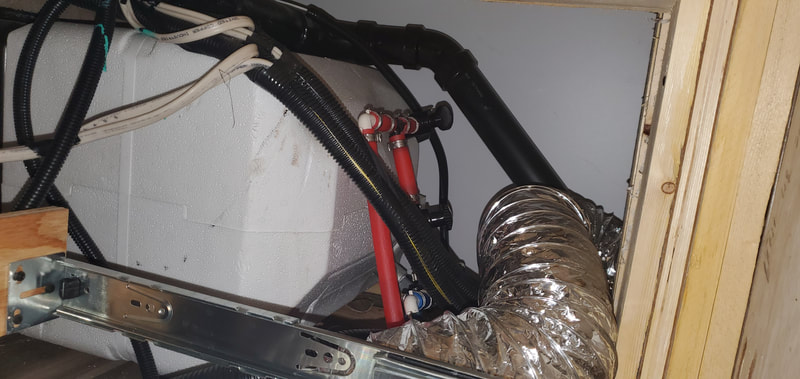
This write up is based on our 2016 Coachmen Prism. In the first photo, I am giving a general overview of where things are located. The next photo is shot from the rear, looking through the rear cargo door. I removed the paneling that the round access hole is in, in order to get better photos of the valves that are in there. You do not have to remove the paneling for normal winterization.
The photos above do not show their full extents. Please click on each photo to see it in it's entirety.
So, here is what you need to do:
That's it. Your fresh water system is winterized. I will add the de-winterize procedure to this page in the spring. Have a happy winter!
The photos above do not show their full extents. Please click on each photo to see it in it's entirety.
So, here is what you need to do:
- In preparation for winterizing, open the fresh water tank drain valve and allow the fresh water tank to completely drain. I help facilitate this by driving the RV with the drain valve open. Once the tank is empty, close the fresh water tank drain valve.
- The next item to address is the hot water heater. On our 2016 Coachmen Prism, the factory included a hot water heater bypass valve setup. Photo #4 shows the back of the hot water heater. This is accessible by removing the large drawer that is under the refrigerator. There are 3 valves for the bypass system. One for cold water inlet line at the bottom of the hot water heater. This valve needs to be closed. One for the hot water outlet at the top of the hot water heater. This valve needs to be closed. And lastly, there is a "bypass" water line that runs between the cold water line and the hot water line. This valve needs to be opened. This allows RV anti freeze to be pumped through the hot water lines.
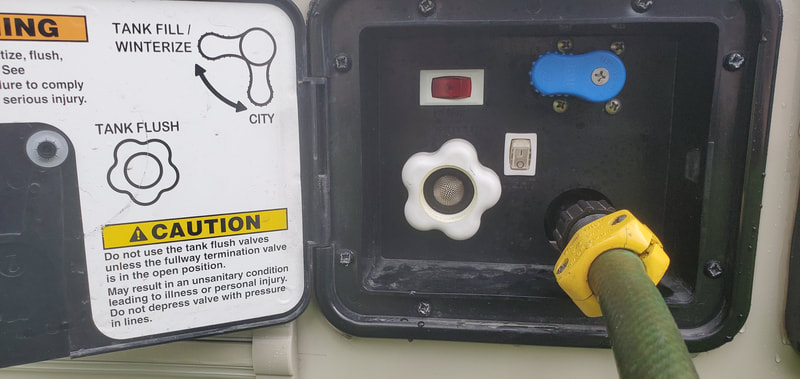
- Next, with the Tank Fill/Winterize/City valve in the "City" position, I connect an air hose set to no more than 40 psi to the water inlet.
- Once the compressed air is connected, open each water faucet one at a time until only a light water vapor is expelled and then close the faucet. Proceed to the next faucet. Don't forget the toilet.
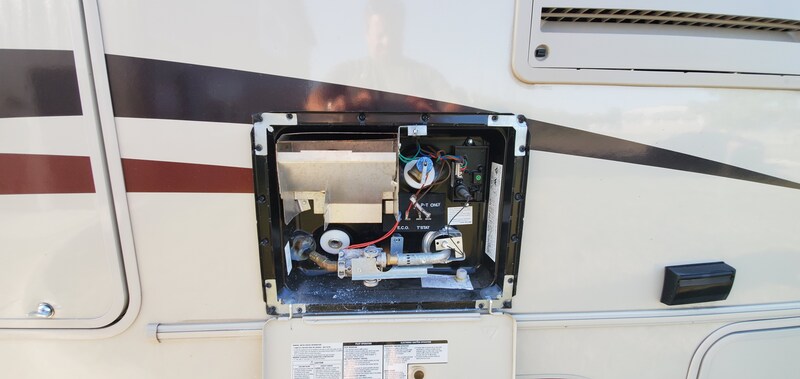
- FOR THE NEXT STEP, PLEASE MAKE SURE THAT THE HOT WATER HEATER HAS BEEN TURNED OFF AND THAT THE WATER IN THE HOT WATER HEATER TANK HAS COMPLETELY COOLED. FAILURE TO DO SO COULD RESULT IN SERIOUS INJURY!! Open the hot water heater access panel on the outside of the RV, Then, carefully open the pressure relief valve. This valve is located just below the latch that holds the access cover in the closed position. Be careful as there may be pressure on the water system and water may exit with force. Once the pressure relief valve has been opened, next remove the drain plug. This plug is located at the bottom left of the hot water heater. It is plastic and is best removed using a 3/4" socket. When the plug is removed, the entire contents of the hot water tank will drain out. I prefer to leave the drain plug out during winter storage, but I do stuff some steel wool into the drain hole, to keep critters out. Just be careful so you can remove all of the steel wool when you de-winterize.
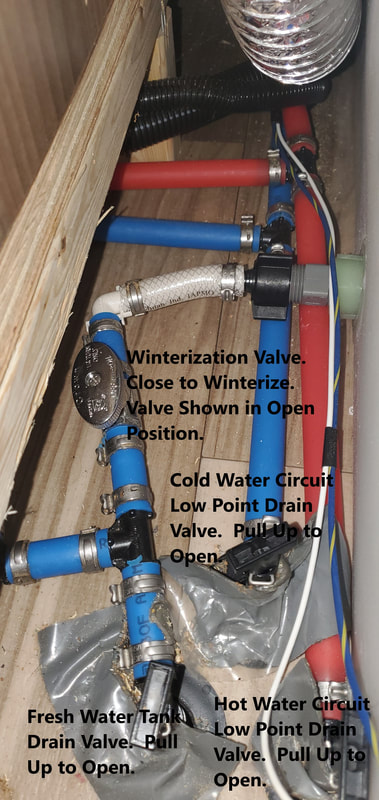
- As shown in photo #3, the chrome colored valve needs to be placed in the closed position. This disconnects the fresh water storage tank from the fresh water system. At this point, all three of the other valves need to be left in their closed position.
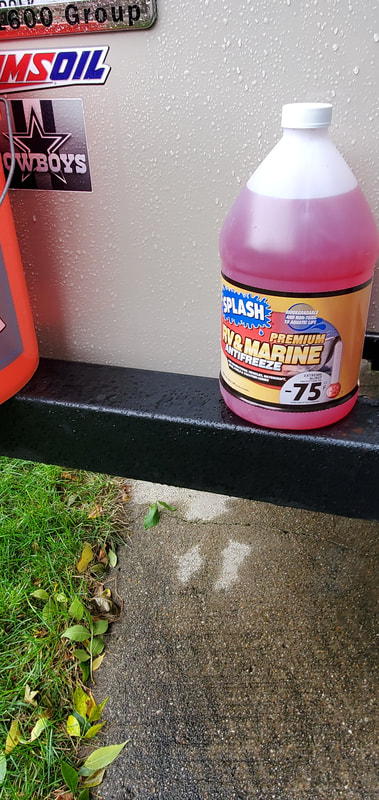
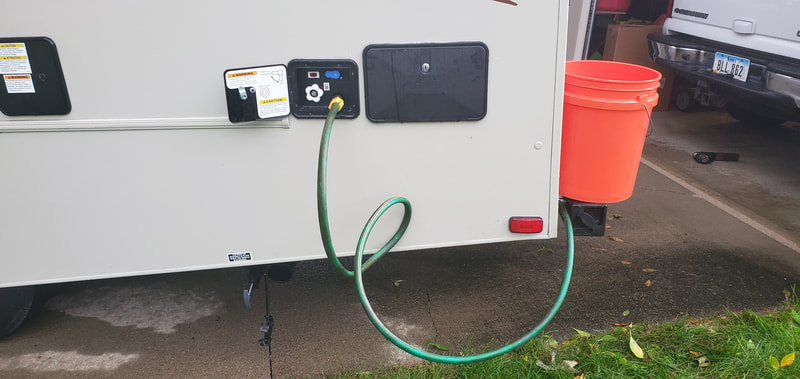
- For the next step, I use an orange Home Depot bucket. I drilled a hole in the bottom and fitted a 90 degree, barbed fitting and a length of old garden hose. On the other end of the hose, I installed a standard male garden hose fitting. Connect this hose to the water fill/city water connection. Place the valve at the water connection in the "Tank Fill/Winterize" position. Since we put the winterization valve in the closed position in step 1, when you turn the water pump on, it will draw the RV antifreeze from the bucket. Next, add RV antifreeze to the bucket. I use 3 gallons. Your usage may vary.
- Make sure that all of your faucets are in the off position, then turn the water pump on. The pump should run until the water system is pressurized. Once the pump stops, open each water faucet one at a time. Both hot and cold. Let each faucet run until a steady stream of RV antifreeze runs out. Flush the toilet until a steady flow of antifreeze runs there, too.
- Make sure you run plenty of antifreeze down each drain. You will want to make sure that each "p" trap has been filled with antifreeze to prevent them from freezing and cracking. I do this by simply letting each faucet run long enough with antifreeze coming out to sufficiently fill each drain "p" trap.
- After you are confident that each faucet has run enough antifreeze through it, turn the water pump off. At this point, I open all faucets, both hot and cold. I then also open each of the low point drains that are located in the back storage area, by the winterization valve. You also need to make sure the winterization valve is placed back in the open position. Otherwise, the fresh water tank will not be able to drain.
- Don't forget to drain and rinse your black and grey holding tanks, too. I do this prior to winterizing the fresh water system. I leave the drain valves open for winter storage, with the cap removed. This will allow the tanks to dry completely and reduce teh risk of any freeze damage.
That's it. Your fresh water system is winterized. I will add the de-winterize procedure to this page in the spring. Have a happy winter!
| Current Catalog with Preferred Customer Pricing.pdf | |
| File Size: | 8156 kb |
| File Type: | |
Thank you for visiting our site, it is here to help you discover all that AMSOIL has to offer to you. K16 Synthetics is here to be your partner in all things AMSOIL. For some, AMSOIL may be a well known product and you need assistance finding a local retailer. We can point you to a few! For others, AMSOIL products may be unknown to you. We can show you what its all about. For some, you may want to start your own business. We can be your partner, whether you are in Central Iowa or anywhere in the Great United States. Whatever your endeavors, we would be honored to help you along the way. Please browse our pages and let us know how we can help!
AMSOIL offers the best, fully synthetic, made in America lubricants for all of your needs. Cars, trucks, boats, bikes, hydraulics, compressors, industrial, you name it, we most likely have it. Request a free catalog below. We will not use your contact information in any way other than to send a catalog.
AMSOIL offers the best, fully synthetic, made in America lubricants for all of your needs. Cars, trucks, boats, bikes, hydraulics, compressors, industrial, you name it, we most likely have it. Request a free catalog below. We will not use your contact information in any way other than to send a catalog.
|
|
|
|
The biggest, baddest outboard motors ever produced!! Seven Marine has chosen AMSOIL Synthetics as the factory fill and recommended service fluids for these awesome motors!! Trusted to protect the best there is.
|
\
